How to Install Nextcloud on CentOS 7
Nextcloud is an open source application for self hosted file sharing and syncing. It supports desktop apps and mobile clients (Android and iOS) for file sharing and store personal content like documents, pictures, videos, etc in a centralized location just like Dropbox.
It provides additional features like Calendar, Contacts, Streaming media, Schedule tasks, Browser-based text editor, URL shortening suite, Gallery, RSS feed reader, Document viewer tools from within Nextcloud, Connection to Dropbox, Google Drive and Amazon S3, etc.
Requirement
- HTTP server running Apache
- PHP version >= 7.2.5 (7.4 is recommended)
- PHP Extensions - mysqli, gd, imap, json, mbstring, xml, curl, intl, zip, imagick, mcrypt
- MariaDB database equivalent >= 10 (10.4 is recommended)
Update System
sudo yum update
Install Basic Packages
sudo yum install vim unzip wget
Change SELinux mode to Permissive
Edit the /etc/selinux/config file as follows and reboot the system
sudo vim /etc/selinux/config
# This file controls the state of SELinux on the system.
# SELINUX= can take one of these three values:
# enforcing - SELinux security policy is enforced.
# permissive - SELinux prints warnings instead of enforcing.
# disabled - No SELinux policy is loaded.
SELINUX=permissive
# SELINUXTYPE= can take one of these two values:
# targeted - Targeted processes are protected,
# minimum - Modification of targeted policy. Only selected processes are protected.
# mls - Multi Level Security protection.
SELINUXTYPE=targeted
Install PHP
For installing PHP 7, EPEL and Remi repository need to install and enable on CentOS 7 system with the below commands.
sudo yum install https://dl.fedoraproject.org/pub/epel/epel-release-latest-7.noarch.rpm
sudo yum install http://rpms.remirepo.net/enterprise/remi-release-7.rpm
Install yum-utils, it is a collection of tools and programs for managing yum repositories, installing debug packages, source packages, extended information from repositories and administration. Use the yum-config-manager program to enable Remi repository as the default repository for installing PHP 7.4 version.
sudo yum install yum-utils
sudo yum-config-manager --enable remi-php74
Install PHP and the required extensions.
sudo yum install php php-gd php-json php-mysql php-curl php-mbstring php-intl php-mcrypt php-imagick php-xml php-zip
Configure the timezone in php.ini file. Uncomment date.timezone = and enter the respective timezone.
sudo vim /etc/php.ini
date.timezone = Asia/Kolkata
Install Apache
sudo yum install httpd
Start and enable the Apache services at boot time.
sudo systemctl start httpd
sudo systemctl enable httpd
Install MariaDB Database
By default CentOS 7 base repository provides MariaDB 5.5 version, which will work for osTicket application. But in this tutorial, we will install the latest version of MariaDB 10.4
Create repo for MariaDB 10.4
sudo vim /etc/yum.repos.d/MariaDB.repo
[mariadb]
name = MariaDB
baseurl = http://yum.mariadb.org/10.4/centos7-amd64
gpgkey=https://yum.mariadb.org/RPM-GPG-KEY-MariaDB
gpgcheck=1
Install MariaDB and its dependencies
sudo yum install MariaDB-server
Start and enable the MariaDB Server services at boot time.
sudo systemctl start mariadb
sudo systemctl enable mariadb
Configure MariaDB
sudo mysql_secure_installation
Create Database and user account for Nextcloud
sudo mysql -u root -p
create database nextclouddb;
create user 'nextclouduser'@'localhost' identified BY 'Linuxyogi@123';
grant all privileges on nextclouddb.* to nextclouduser@localhost;
flush privileges;
Install Nextcloud
Download the latest stable release of Nextcloud to document root directory.
cd /var/www/html/
wget https://download.nextcloud.com/server/releases/latest.zip
Configuration
Unzip the downloaded file
cd /var/www/html/
unzip latest.zip
Install Dependencies
Create the directory to store data. Optionally we can use symlink this data directory to NAS, NFS or SAN mount point according to the requirement.
mkdir /var/www/html/nextcloud/data
Change the ownership and permission on support directory.
chown apache:apache -R /var/www/html/nextcloud
Allow http or https (in case of SSL use) services from Firewall for Nextcloud web installer and Dashboard access.
sudo firewall-cmd --zone=public --permanent --add-service=http
sudo firewall-cmd --reload
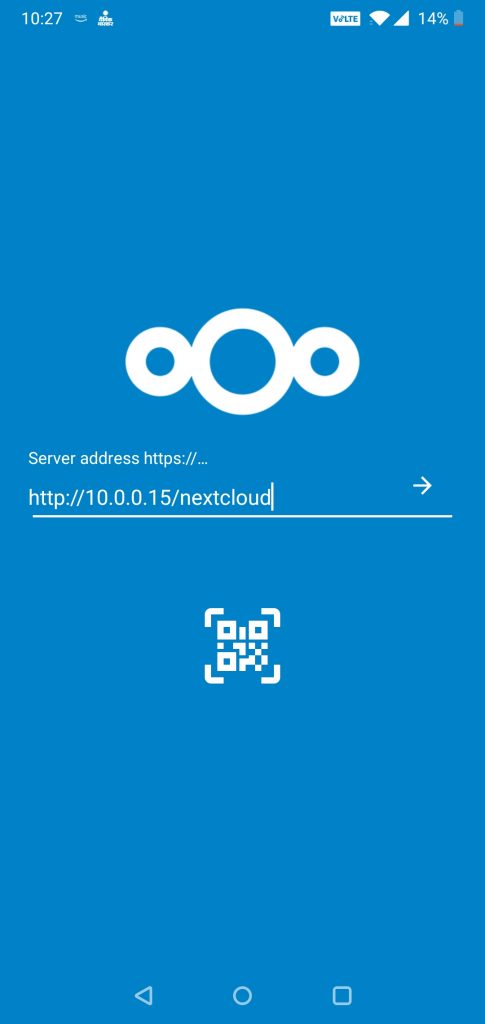
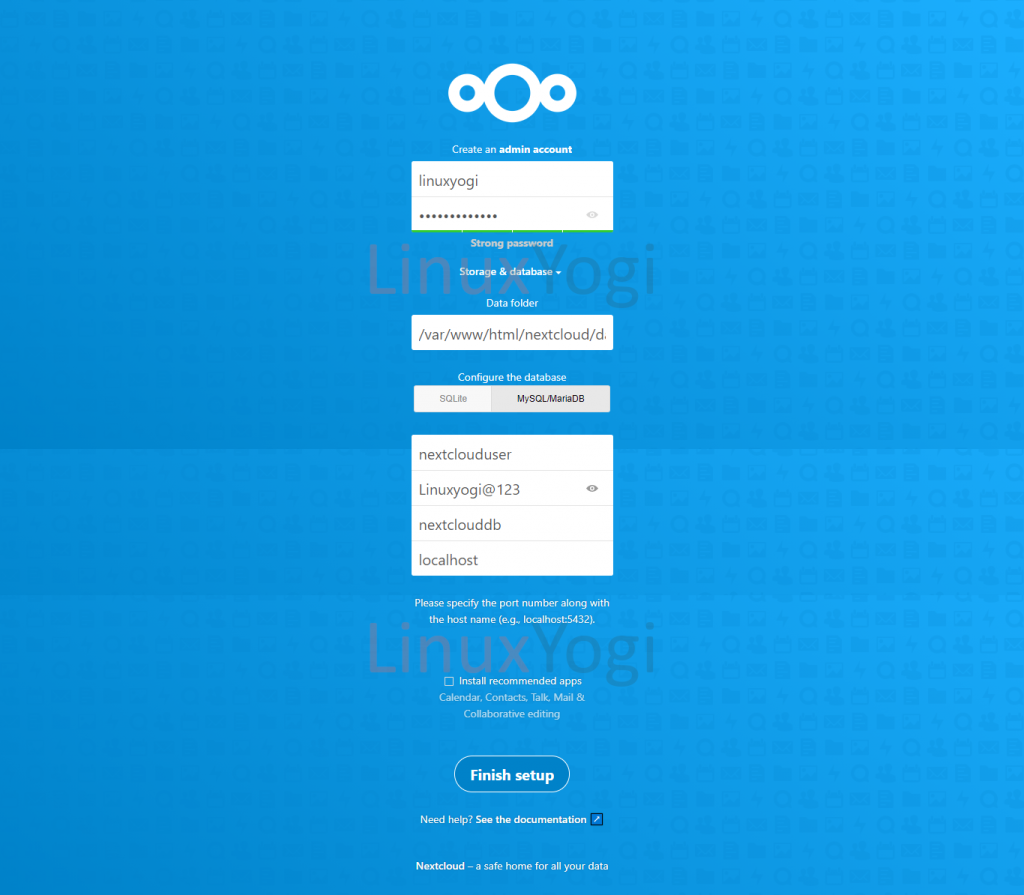
Open browser and navigate to "http://<server-ip>/nextcloud" and Click Next.
example - http://10.0.0.15/nextcloud
Create admin user and fill the database information like Database Name, Database Username, Database Password and Database Server Address.
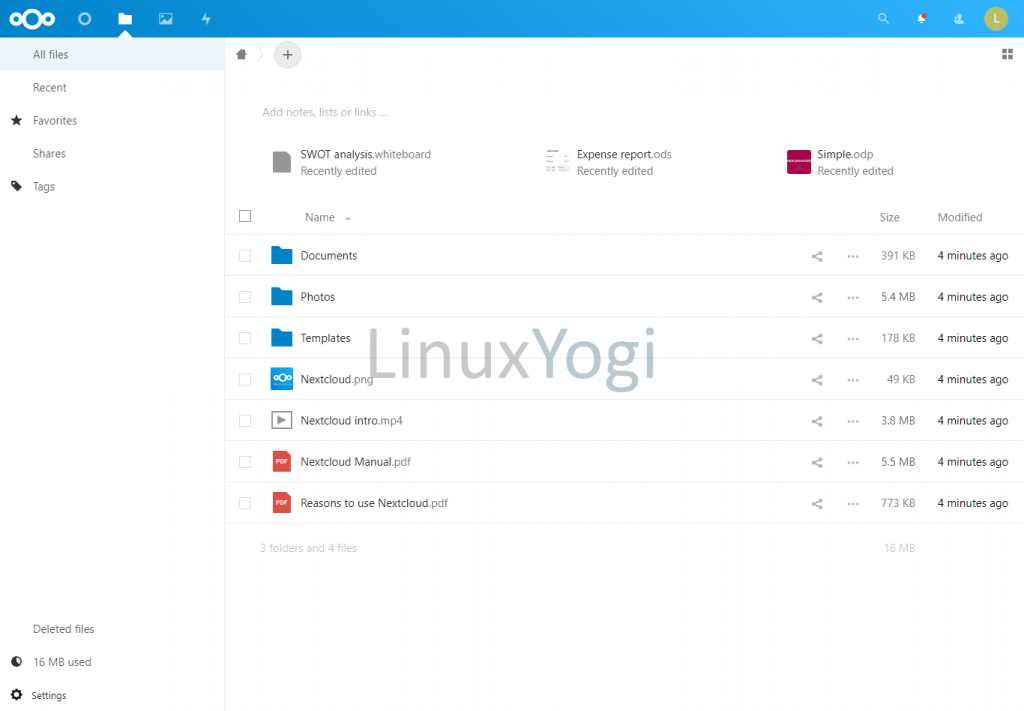
Dashboard is ready for the use. Navigate to http://<server-ip>/nextcloud/index.php/apps/dashboard/
example - http://10.0.0.15/nextcloud/index.php/apps/dashboard/
Install Nextcloud Agent on end user devices to access files/folders and start syncing.
Address - http://10.0.0.15/nextcloud