How to Install osTicket on Rocky Linux 9
osTicket is a free and open-source customer support ticketing system and widely-used globally. It seamlessly integrate with inquiries created via email, phone and web-based forms into a simple easy-to-use multi-user web interface. Manage, organize and archive all your support requests and responses in one place while providing your customers with accountability and responsiveness they deserve. It is a simple, lightweight, reliable, open source, web-based and easy to setup and use help desk ticketing system.
In this tutorial, we will explain how to install and configure osTicket on Rocky Linux 9
Requirement
- HTTP server running Apache
- PHP version 8.0 to 8.1, 8.0 is recommended
- PHP Extensions - mysqli, gd, gettext, imap, json, mbstring, xml, intl, apcu, opcache, zip, curl
- MySQL database version 5.5 or greater or MariaDB equivalent
Update System
sudo yum update
Install PHP
For installing php-imap ,EPEL and Remi repository need to install and enable on Rocky Linux 9 system with the below commands.
sudo yum install https://dl.fedoraproject.org/pub/epel/epel-release-latest-9.noarch.rpm
sudo yum install http://rpms.remirepo.net/enterprise/remi-release-9.rpm
Install yum-utils, it is a collection of tools and programs for managing yum repositories, installing debug packages, source packages, extended information from repositories and administration.
sudo yum install yum-utils
Enable the php:remi-8.0 module stream.
sudo dnf module enable php:remi-8.0 -y
Install PHP and the required extensions.
sudo yum install php php-cli php-fpm php-common php-mbstring php-curl php-gd php-mysqlnd php-json php-xml php-intl php-pecl-apcu php-opcache php-zip php-imap
Configure the timezone in php.ini file. Uncomment date.timezone = and enter the respective timezone.
sudo vim /etc/php.ini
date.timezone = Asia/Kolkata
Install Basic Packages
sudo yum install vim git composer
Change SELinux mode to Permissive
Edit the /etc/selinux/config file as follows and reboot the system
sudo vim /etc/selinux/config
# This file controls the state of SELinux on the system.
# SELINUX= can take one of these three values:
# enforcing - SELinux security policy is enforced.
# permissive - SELinux prints warnings instead of enforcing.
# disabled - No SELinux policy is loaded.
SELINUX=permissive
# SELINUXTYPE= can take one of these two values:
# targeted - Targeted processes are protected,
# minimum - Modification of targeted policy. Only selected processes are protected.
# mls - Multi Level Security protection.
SELINUXTYPE=targeted
Install Apache
sudo yum install httpd
Start and enable the Apache services at boot time.
sudo systemctl start httpd
sudo systemctl enable httpd
Install MariaDB Database
By default Rocky Linux 9 appstream repository provides MariaDB 10.5.16 version, which will work for osTicket application.
Install MariaDB and its dependencies
sudo yum install mariadb-server
Start and enable the MariaDB Server services at boot time.
sudo systemctl start mariadb
sudo systemctl enable mariadb
Configure MariaDB
sudo mysql_secure_installation
Create Database and user account for osTicket.
sudo mysql -u root -p
create database osticketdb character set UTF8 collate utf8_bin;
create user 'osticketuser'@'localhost' identified BY 'Linuxyogi@123';
grant all privileges on osticketdb.* to osticketuser@localhost;
flush privileges;
Install osTicket
Clone the latest stable release of osTicket to new document root directory called "support".
cd /var/www/html/
sudo git clone https://github.com/osTicket/osTicket support
Change the ownership of support directory.
sudo chown -R apache:apache support
cd support/include/
sudo cp ost-sampleconfig.php ost-config.php
sudo chown -R apache:apache ost-config.php
Allow TCP ports 80 and 443 from Firewall for osTicket web installer and Dashboard access.
sudo firewall-cmd --add-service=http --permanent
sudo firewall-cmd --reload
Web Installation to Setup osTicket
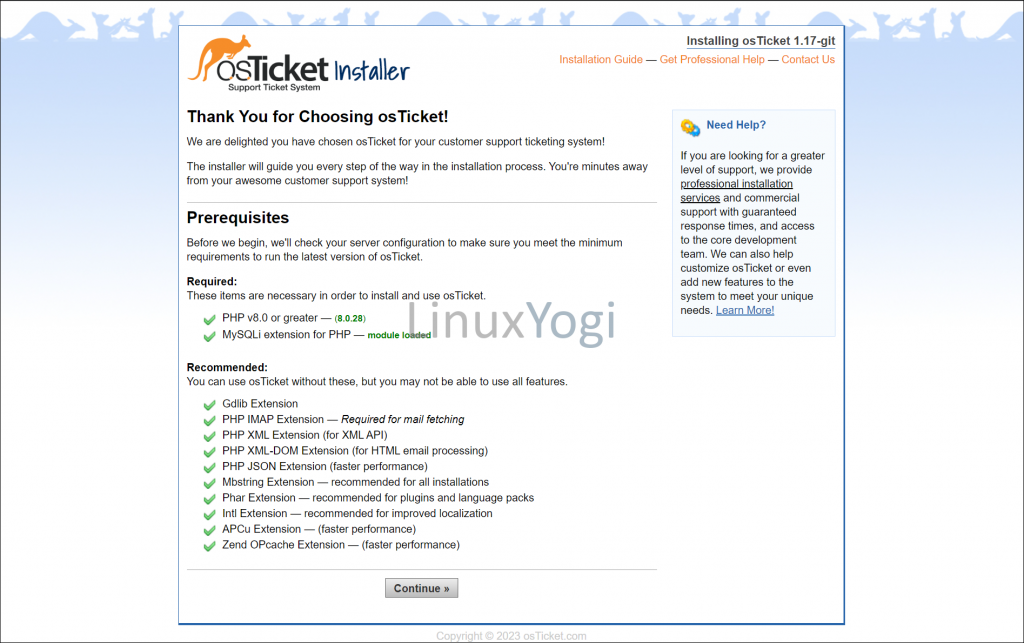
Open browser and navigate to http://<server-ip>/support and make sure all prerequisites are marked green. Click Continue.
example- http://10.0.0.10/support
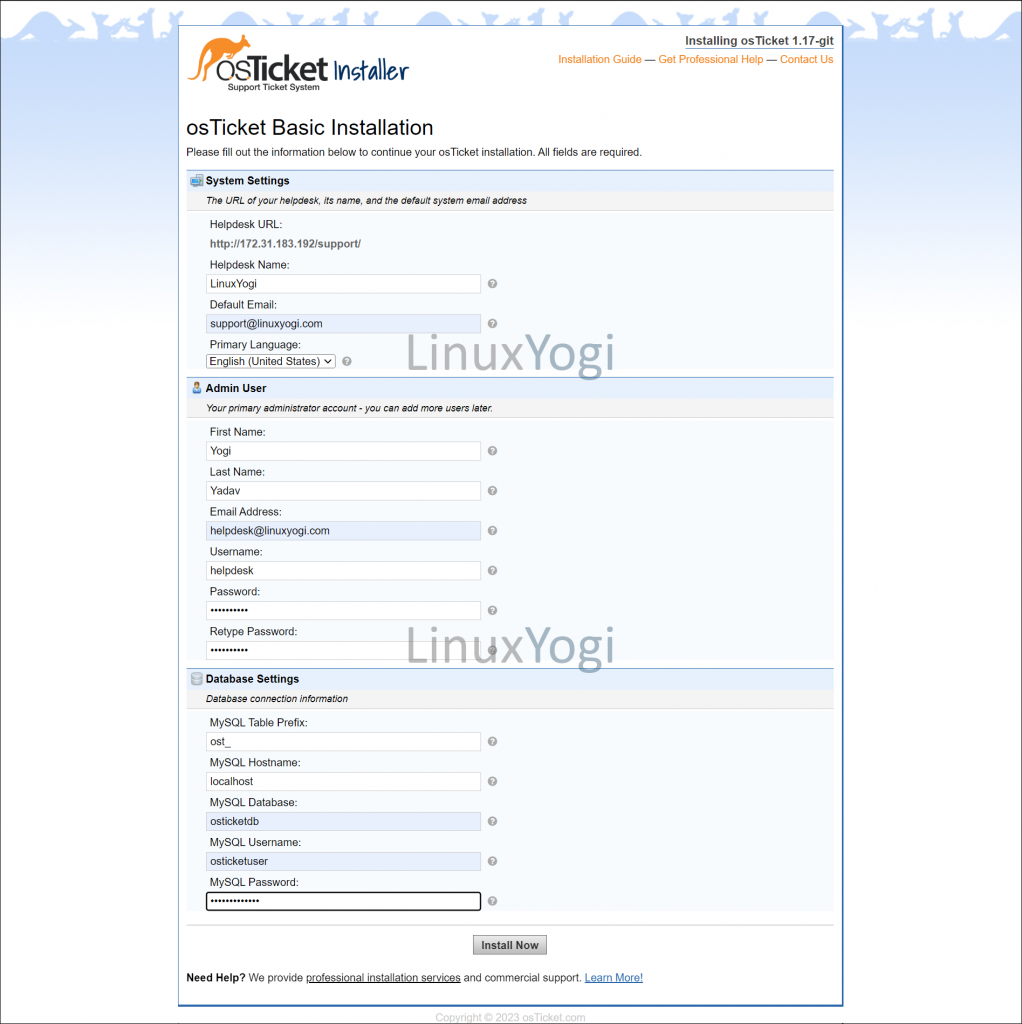
Fill the System Settings, Admin User details and osTicket Database name, Database username and Database password for Database connection. Click Install Now.
Information links of osTicket URL and admin panel will be available in below window.
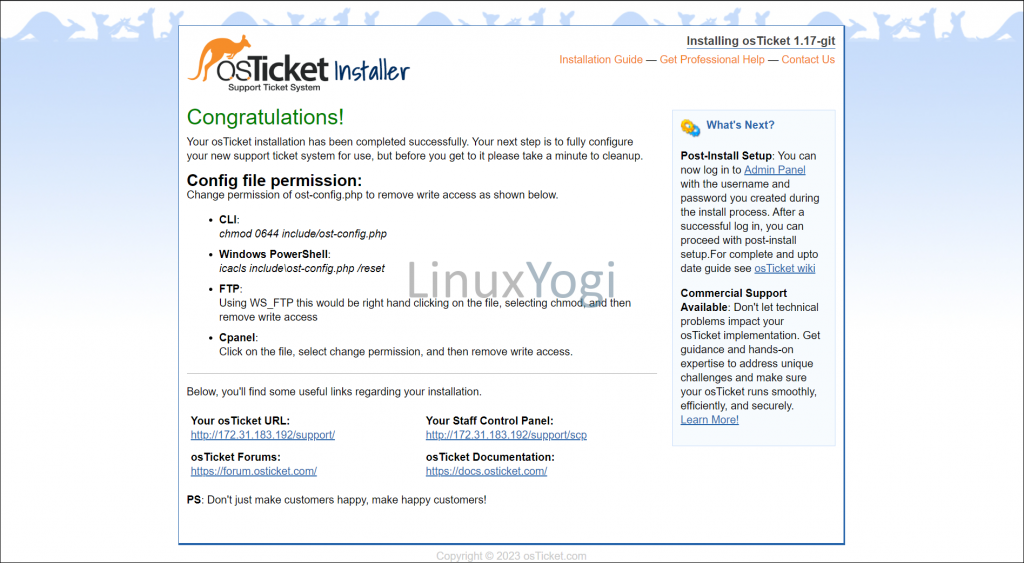
In this below step, configuration file permission need to be changed. So change the file permission of ost-config.php file to 0644 from the terminal and Click Continue.
cd /var/www/html/support/include/
sudo chmod 0644 ost-config.php
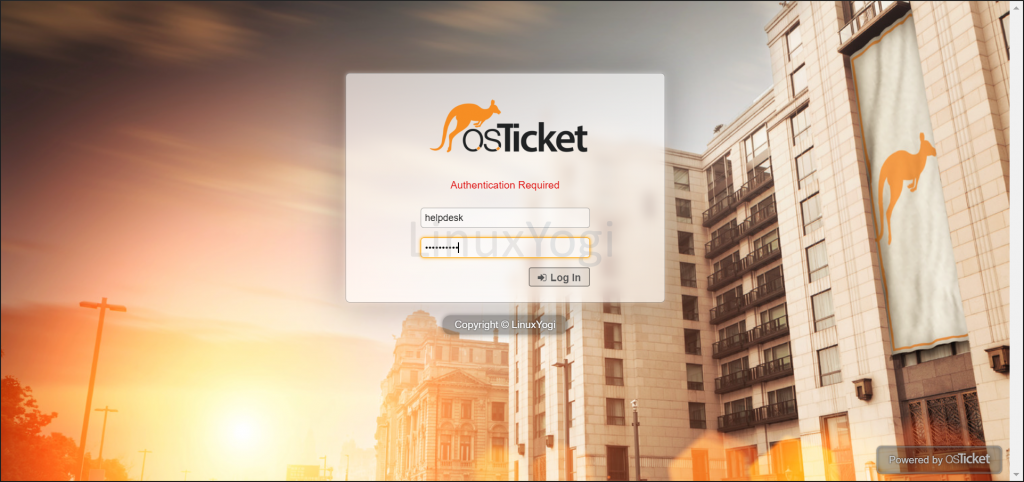
Open browser and navigate to http://<server-ip>/support/scp for Admin panel.
example: http://10.0.0.10/support/scp
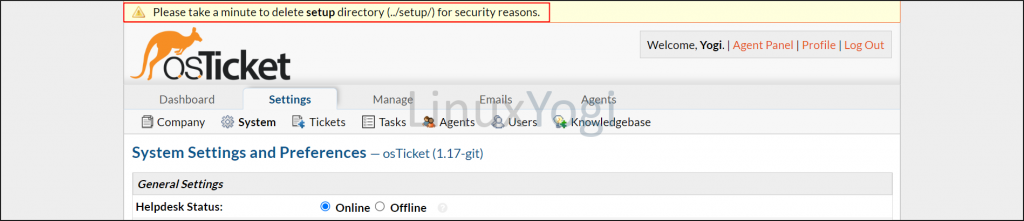
As shown in below picture remove setup directory from terminal
sudo rm -rf /var/www/html/support/setup